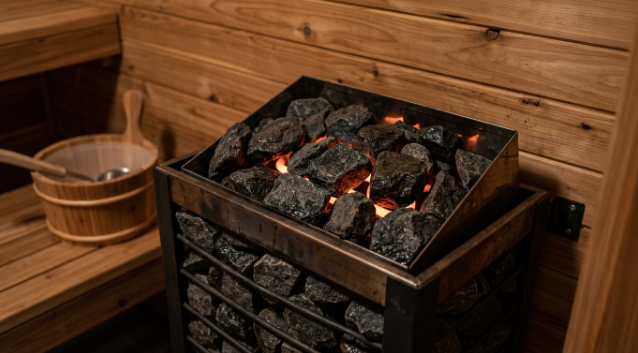
A sauna heater installation comes down to three things done correctly: a properly sized 240V electrical circuit, a non-combustible or approved base beneath and around the unit, and clearance distances from the manufacturer spec sheet followed exactly. Skipping any one of these creates a fire risk or voids the heater’s warranty, and clearance mistakes are the most common error in small cabins where every inch feels tight. Most straightforward installs with existing electrical capacity nearby take about a day from mounting to a working test run.
Step 1: Confirm Electrical Capacity Before Anything Else
Before a heater ships or a wall gets built, confirm the home’s electrical panel has open capacity for a dedicated 240V circuit sized to the heater’s kilowatt rating. A 6 kW heater generally needs a 30-amp circuit, while smaller 3 to 4.5 kW units may run on a 20-amp circuit depending on the manufacturer. This step should happen with a licensed electrician, not guessed from a spec sheet alone, since panel capacity and code requirements vary by location and by the age of the existing wiring.
Step 2: Pull the Permit
Most areas require an electrical permit for a new 240V circuit regardless of whether the sauna itself needs a structural permit. Skipping this step can create problems later, particularly at home sale time when an unpermitted electrical addition can complicate an inspection or appraisal. A permitted install also typically means the work gets inspected, which is a useful second check on clearance and wiring before the cabin gets closed up.
Step 3: Prepare a Non-Combustible Base
Directly beneath and immediately around most heaters, code and manufacturer instructions call for a non-combustible base pad rather than bare wood flooring. This might be a specific floor protector product or tile set into the floor area under the heater, extending slightly beyond the unit’s footprint. Even in a sauna built almost entirely from wood, this base is a fixed requirement, not an optional upgrade, and it should go in before the heater gets mounted.
Step 4: Mount the Heater at the Correct Clearance
Every heater model publishes exact clearance distances to combustible walls, benches, and the ceiling, and these numbers differ by kilowatt rating and by manufacturer. A guard rail can reduce required side clearance on some models, which matters in a small cabin where a few extra inches of usable bench space makes a real difference. Measure twice against the actual spec sheet before drilling any mounting holes, since a heater installed too close to a wall is both a safety issue and a common reason inspections fail.
Step 5: Run and Connect the Circuit
With the base and mounting position set, the electrician runs the dedicated circuit from the panel to the heater location, typically terminating at a junction box positioned per the manufacturer’s wiring diagram. This is not a step to DIY around in most jurisdictions, both for safety and because unpermitted 240V work can create liability and insurance issues down the line. A GFCI or other required protection device gets installed per local code at this stage as well.
Step 6: Load the Stones Correctly
Stone loading matters more than it looks. Stones need to sit loosely enough to allow airflow through the rock bed, not packed tight, and the total weight should match what the heater manufacturer specifies for that model. Overloading the rock bed restricts airflow and can shorten element life, while underloading reduces the heater’s ability to hold steady heat and produce good steam if water is used.
Step 7: Run a Test Cycle Before Regular Use
Before the first real session, run the heater through a full heat-up cycle to confirm it reaches target temperature within the expected time and holds steady without tripping the breaker. This is also the point to double check that clearance distances still look correct once the heater is mounted and hot, since heat expansion can occasionally reveal a mounting issue that wasn’t obvious during a cold install. Buyers who want a heater with clearly published clearance specs and wiring diagrams to plan this whole sequence around can check current models at SweatDecks, where each listing includes the electrical and clearance data needed for this kind of install planning.
Step 8: Confirm Ventilation Before Closing Up the Cabin
A properly installed heater still needs functioning intake and exhaust vents to work as designed, and this is the point in the install sequence to double check that vent placement matches the manufacturer’s recommendation relative to the heater location. Vents positioned too close to the heater can pull in air that is already hot rather than fresh cooler air, which undermines how evenly the cabin heats. This is an easy step to skip once the heater itself is mounted and running, but it directly affects how the finished install actually performs session after session.
Common Mistakes That Show Up During Inspection
Beyond clearance errors, the most common issues an inspector or a careful self-check catches are undersized wire gauge for the circuit run, a missing or incorrectly rated GFCI device where local code requires one, and a base pad that does not extend far enough beyond the heater’s footprint. Each of these is straightforward to fix during the install itself but far more disruptive to correct after the cabin’s interior paneling is finished and the heater has been in use for months. Walking through the full spec sheet one more time before final assembly, rather than relying on memory from earlier in the project, catches most of these before they become a bigger job.
What Do the Studies Say About Consistent Sauna Use?
None of the cited research addresses installation methods directly, since these are population studies of sauna bathing habits, not equipment engineering. A 2018 review in Mayo Clinic Proceedings and a 2018 systematic review in Evidence-Based Complementary and Alternative Medicine both describe cardiovascular associations tied to regular sauna sessions over years, and a 2001 review in The American Journal of Medicine covers both benefits and known risks of sauna bathing. The practical link to installation is straightforward: a heater installed correctly, safely, and reliably is one a household actually keeps using on the kind of regular schedule these studies associate with the reported outcomes.
Frequently Asked Questions
Do I need a permit to install a sauna heater? Most areas require an electrical permit for the 240V circuit, and some require a structural permit for the cabin itself.
What clearance does a sauna heater need from the wall? It varies by manufacturer and output; always check the specific heater’s spec sheet rather than assuming a standard distance.
Can a sauna heater sit directly on a wood floor? No, most installs require a non-combustible base pad beneath and around the heater even in an all-wood cabin.
How long does a sauna heater installation take? Often a single day with existing electrical capacity nearby, longer if new circuit runs or panel work are needed.
References
- Cardiovascular and Other Health Benefits of Sauna Bathing: A Review of the Evidence, Mayo Clinic Proceedings, 2018
- Clinical Effects of Regular Dry Sauna Bathing: A Systematic Review, Evidence-Based Complementary and Alternative Medicine, 2018
- Benefits and risks of sauna bathing, The American Journal of Medicine, 2001
By Grant Pelletier